
Introduction
Welcome to the Bricks MailerLite Integration plugin documentation. This guide will help you install, update, and configure the plugin to seamlessly connect your Bricks forms with MailerLite.
How to install Bricks MailerLite Integration?
- Download the Bricks MailerLite Integration plugin ZIP file from your account.
- Log in to your WordPress admin panel.
- Go to Plugins > Add New Plugin.
- Click Upload Plugin at the top of the page.
- Choose the downloaded ZIP file and click Install Now.
- Once installed, click Activate Plugin.
Now, you need to activate the plugin license to receive regular updates:
- In the WordPress admin panel, go to Bricks > MailerLite Integration.
- In the Product key field, paste your license key.
- Click Activate to complete the process.

How to update Bricks MailerLite Integration?
Updating the Bricks MailerLite Integration plugin is as simple as updating any other WordPress plugin:
- Go to Dashboard > Plugins.
- Find Bricks MailerLite Integration in the list of installed plugins.
- If an update is available, you will see a notification below the plugin name.
- Click Update Now to install the latest version.
- Make sure your license is active to receive updates.
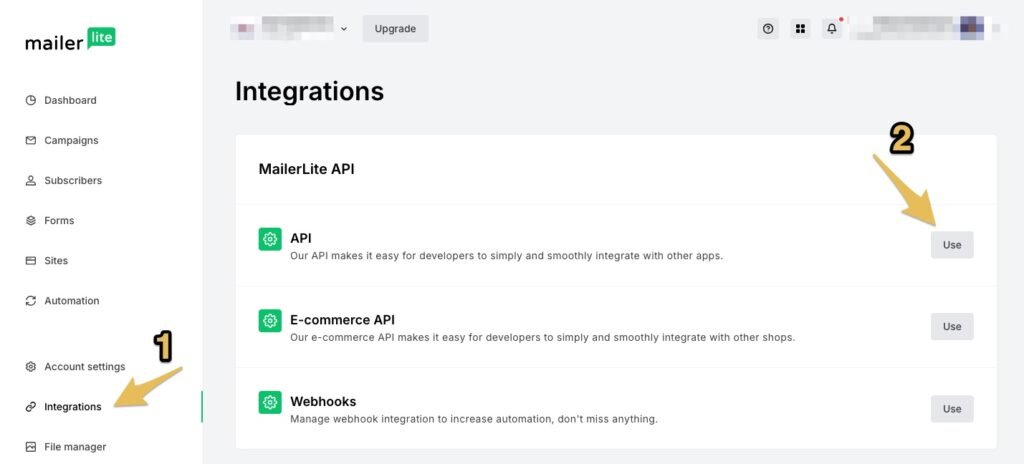
How to connect with MailerLite?
To connect your forms with MailerLite, you need a MailerLite API key.
You can create it in the Integrations > API section of your MailerLite account.
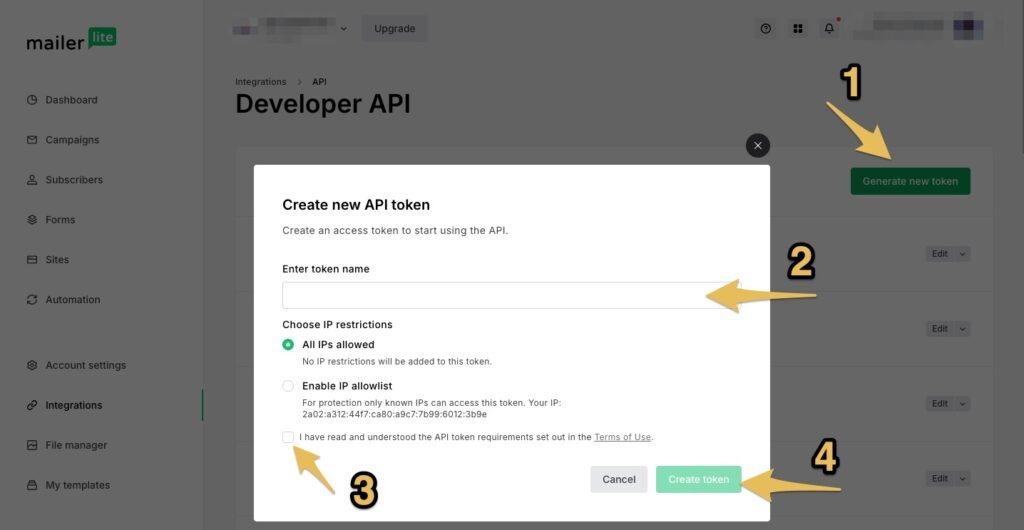
- Click the Generate new token button.
- Enter a name for the token. It can simply be the URL of your website.
- Accept the terms of service and click Create token.
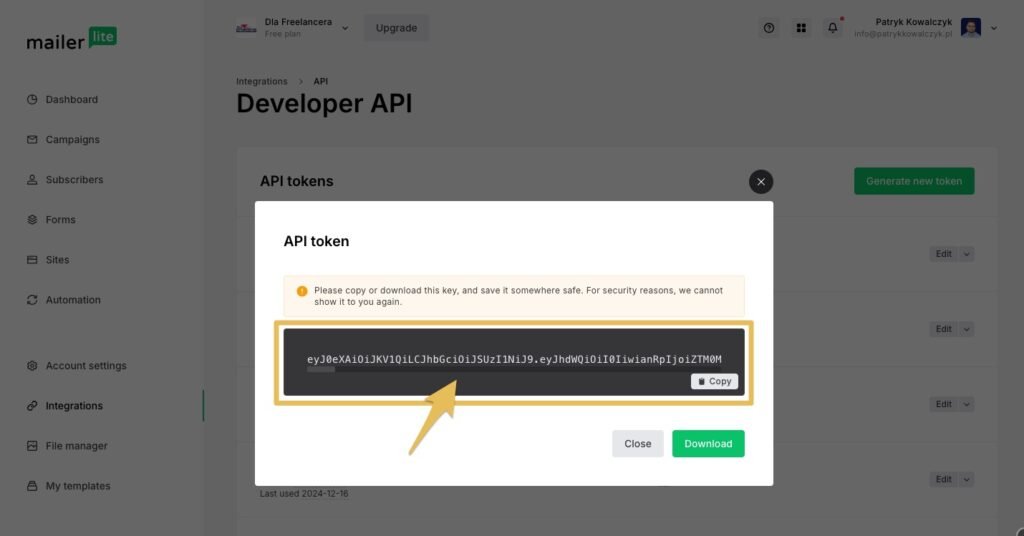
IMPORTANT: You will see the token only once.
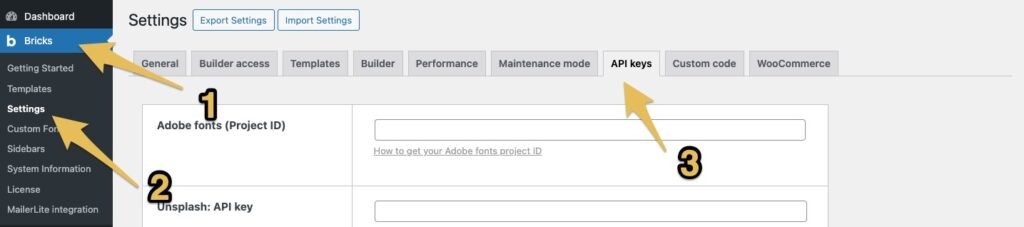
Copy it immediately and paste it on your website admin panel under Bricks > Settings > API Keys in the MailerLite: API key field. Then click Save Settings.
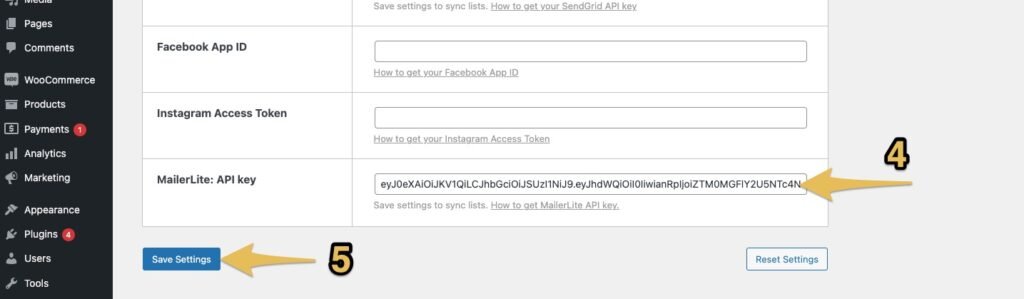
Your site is now connected to MailerLite.
How to configure a Bricks form to send data to MailerLite?
- Open the Bricks builder and create or edit your form.
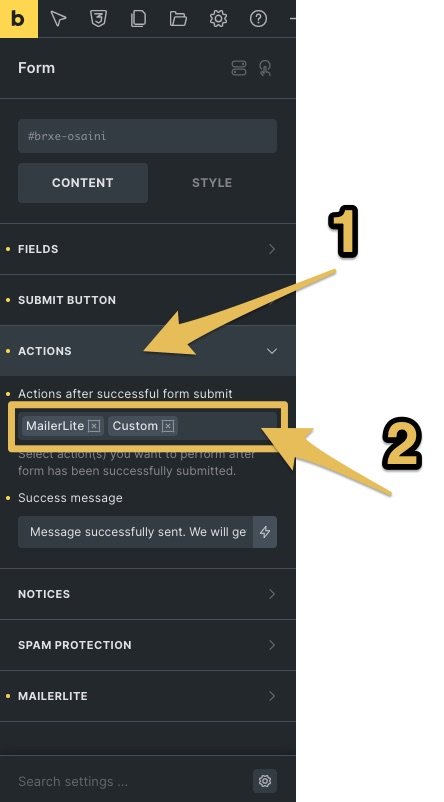
- Go to the Actions After Submit section.
- Select two actions: Custom and MailerLite.
IMPORTANT: To ensure the integration works correctly, you MUST select the Custom action alongside MailerLite.
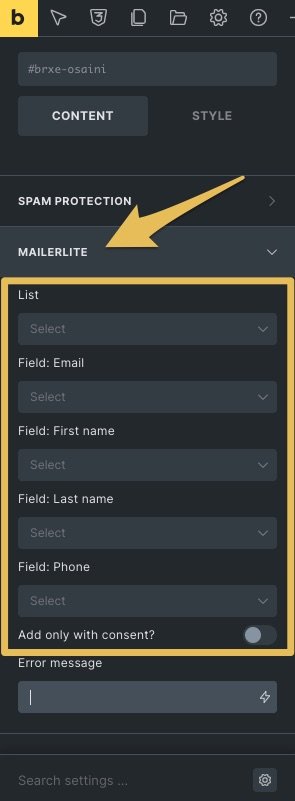
- Go to the MailerLite tab:
- Choose the list where new contacts will be saved.
- Map the form fields (e.g., Name, Email, Phone) to the corresponding fields in MailerLite.
GDPR Compliance
The plugin is GDPR-compliant. To collect data only with user consent:
- Enable the “Add only with consent?” option in the MailerLite settings.
- Add a Checkbox field to your form for consent.
- Link this checkbox to the Consent field in the MailerLite tab.
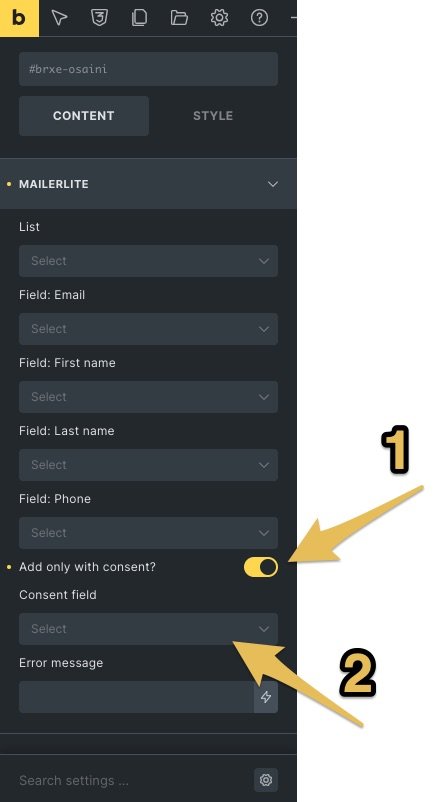
Now, user data will be sent to MailerLite only when consent is given.